You won't believe how much fits into this 19 m2 studio
See how I transformed a 19 m² studio from a basic developer finish into a beautiful, fully functional home with smart storage and modern style.

This project shows how even the smallest apartment can feel complete and inviting when every detail is planned with intention. I designed this space for rental purposes, fitting everything needed for comfort into just 19 square meters.
The brief
The owner purchased this apartment as an investment. The goal was to make it visually appealing, practical, and memorable enough to stand out in the rental market.
Layout
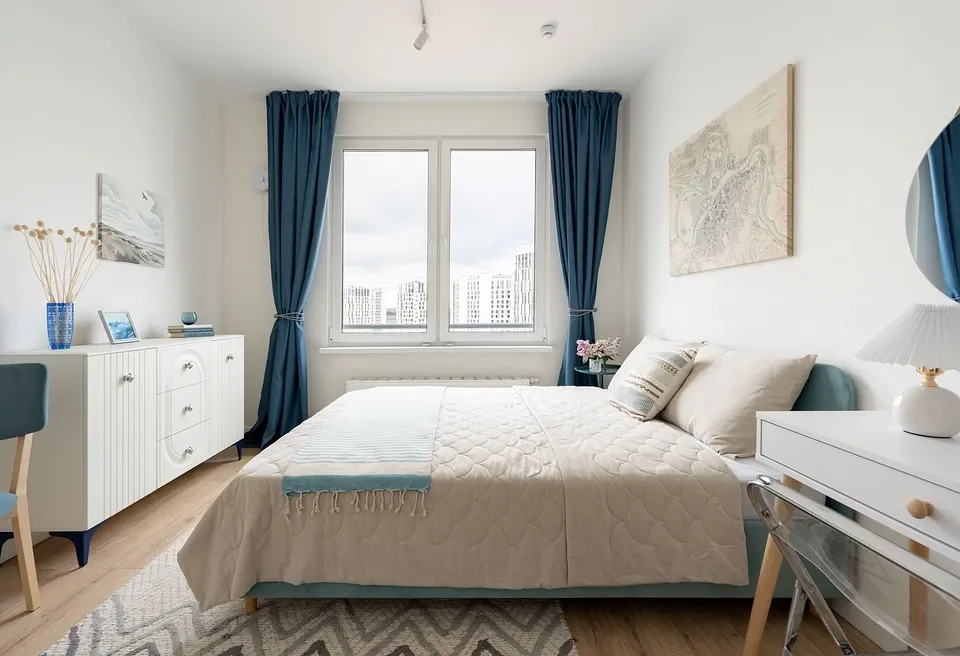
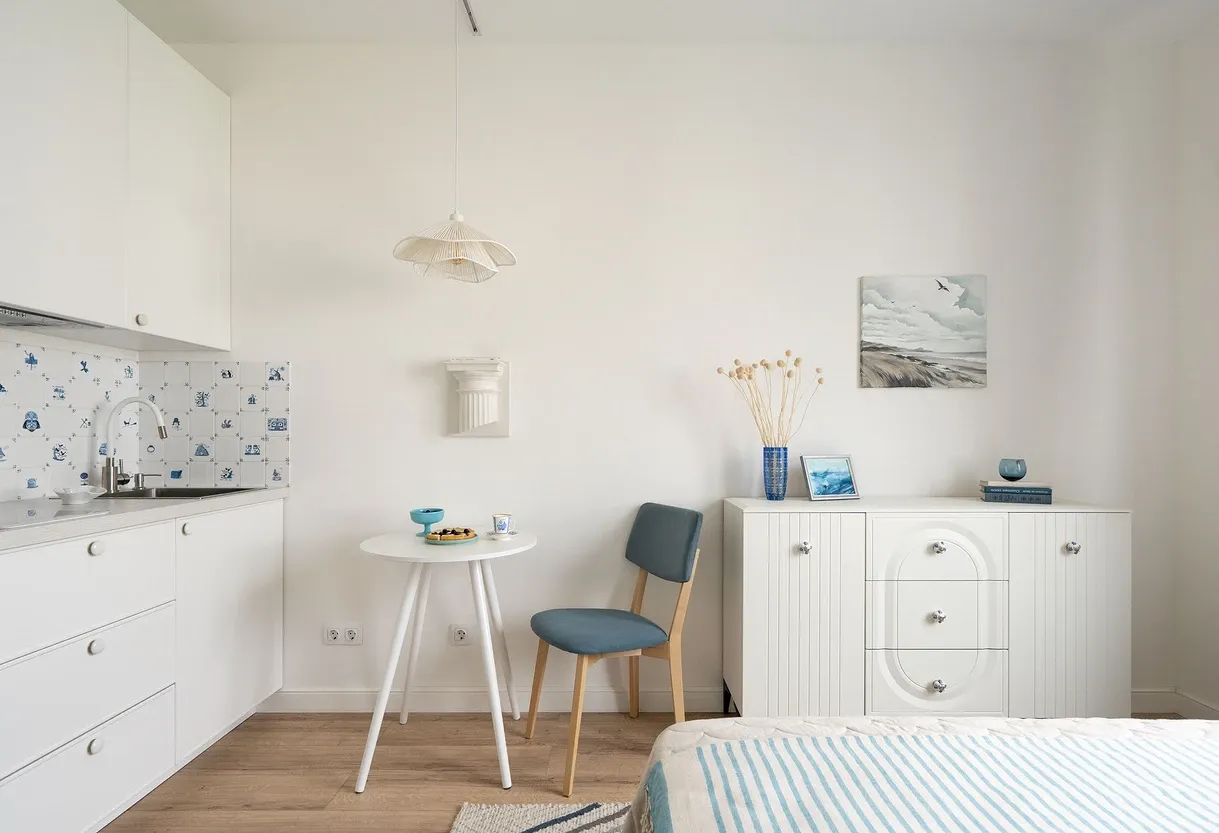
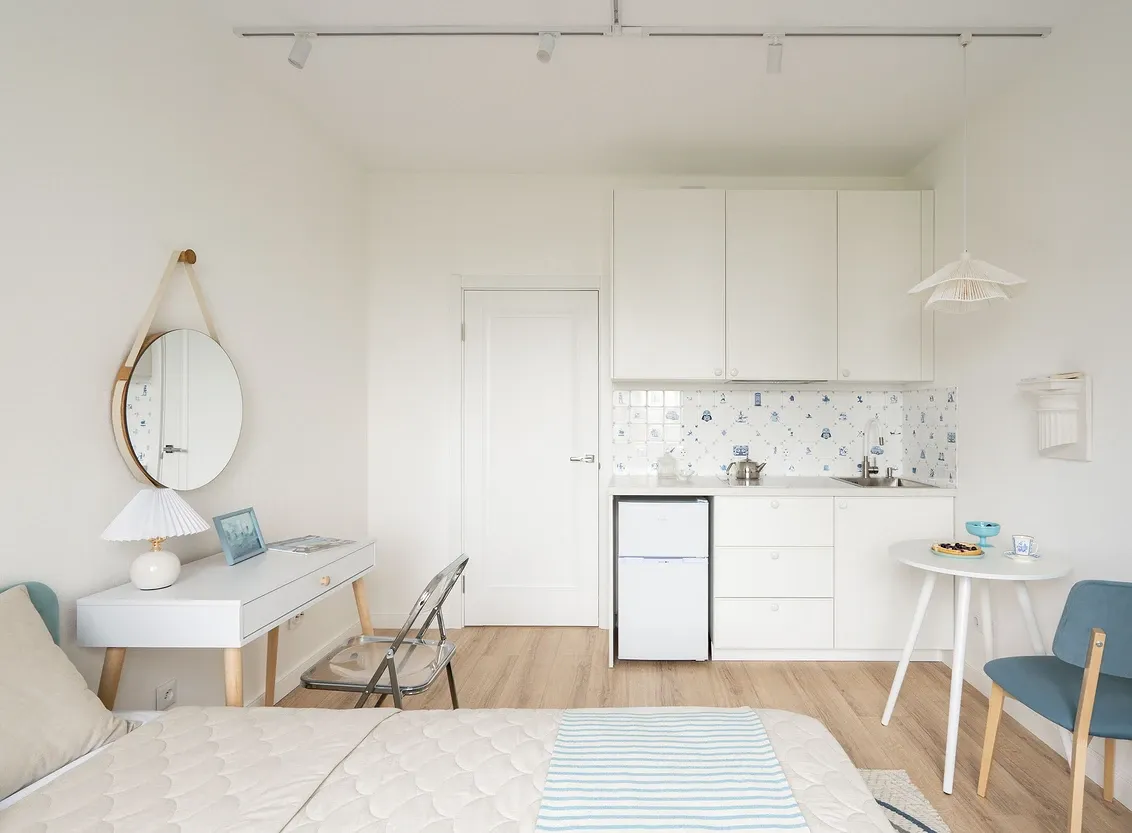
It is a classic studio layout: a long room just under 14 m², a separate bathroom, and a small entrance hallway separated by a door.
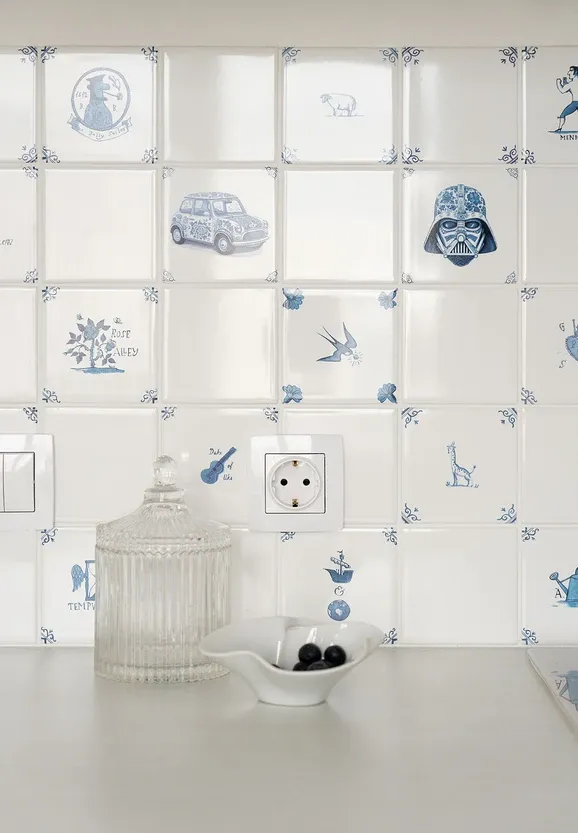
Finishes
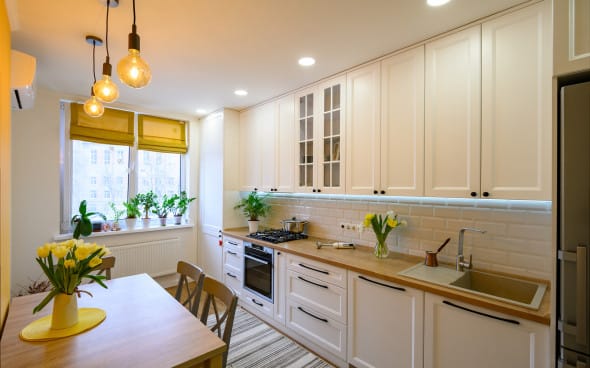
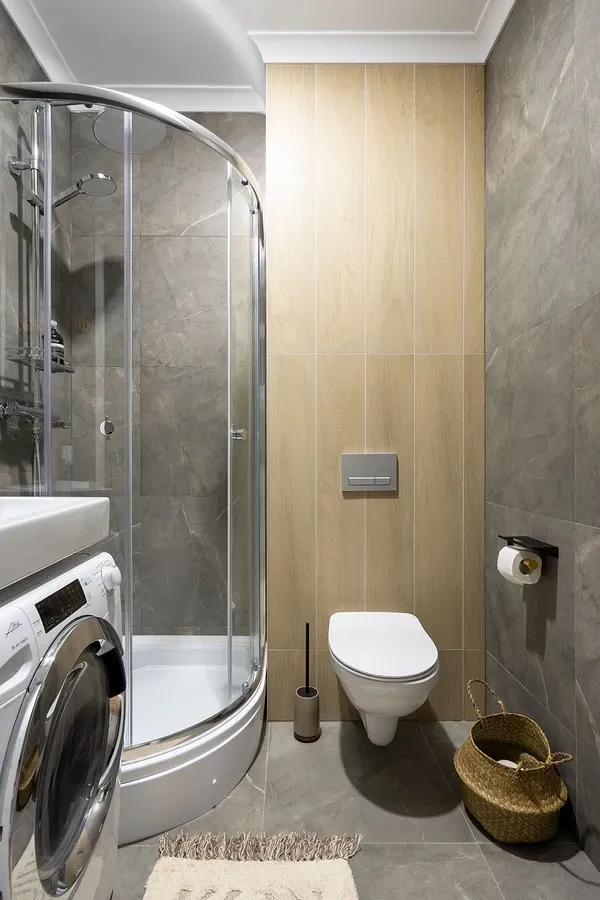
The apartment came with light textured wallpaper, laminate flooring in a pale wood tone, and a bathroom finished with porcelain stoneware in grey and wood patterns. Basic plumbing was already installed: shower, sink, and toilet.
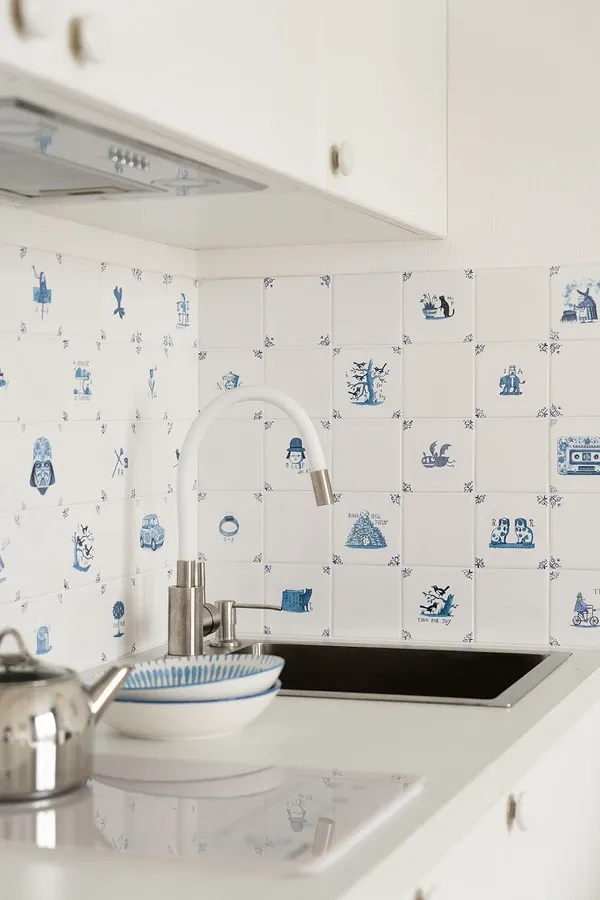
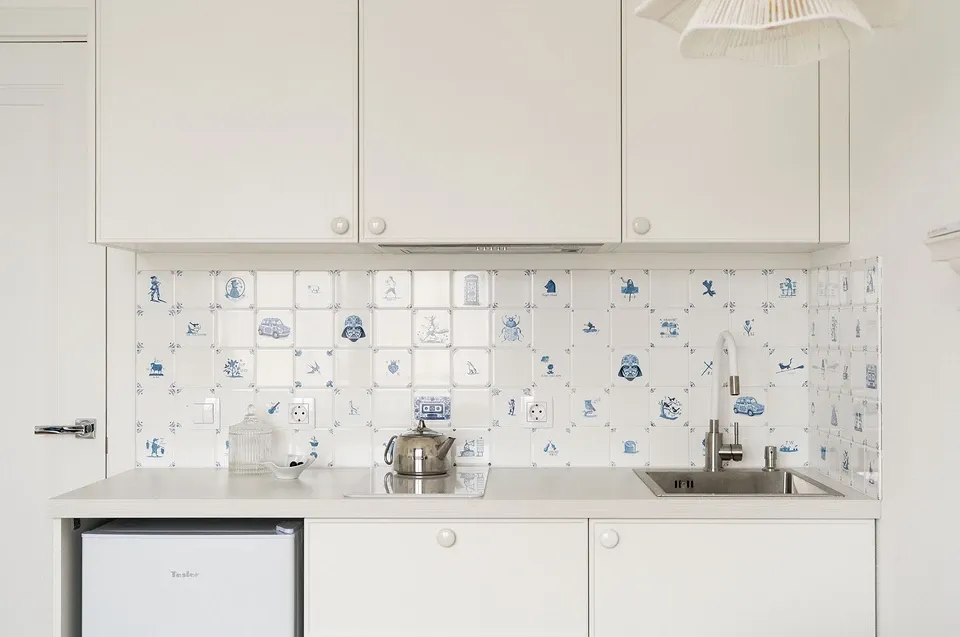
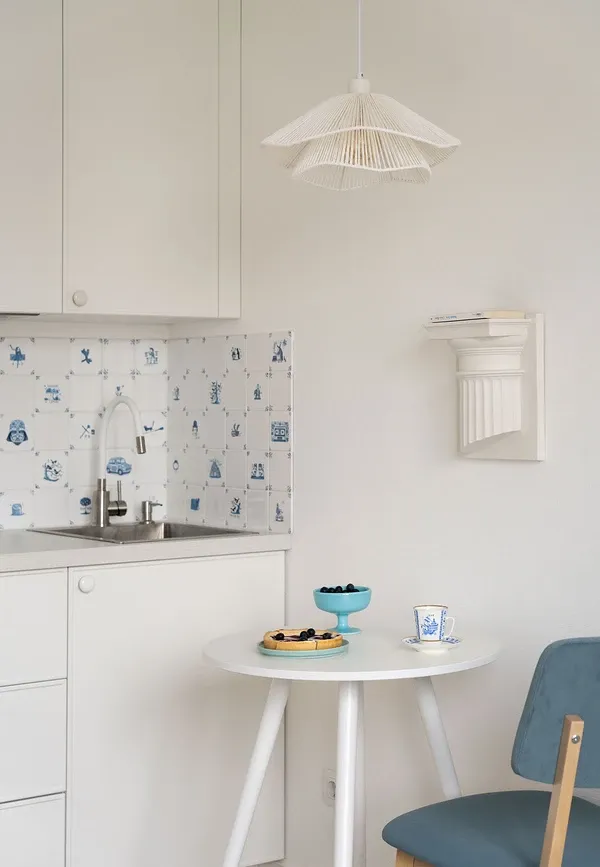
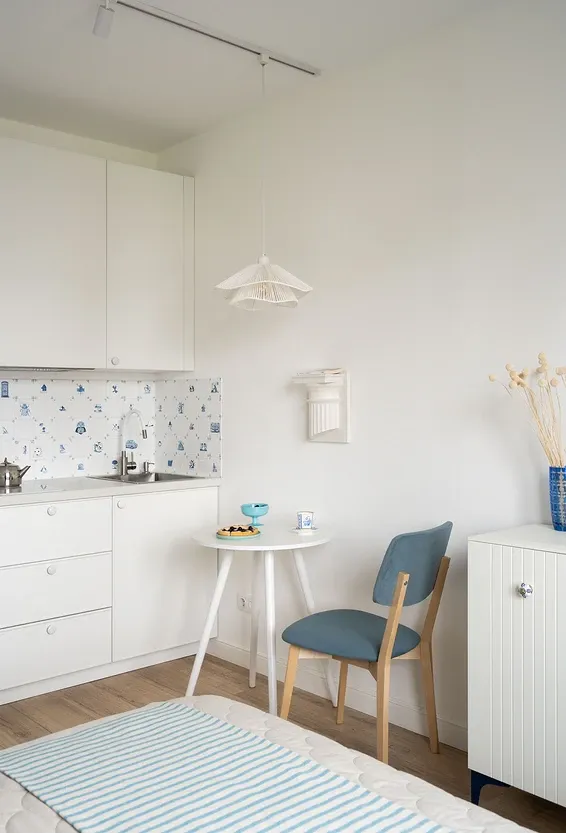
I kept the existing floors and wall finishes, then added a ceramic tile backsplash in a pattern reminiscent of traditional tiles.
Furniture and storage
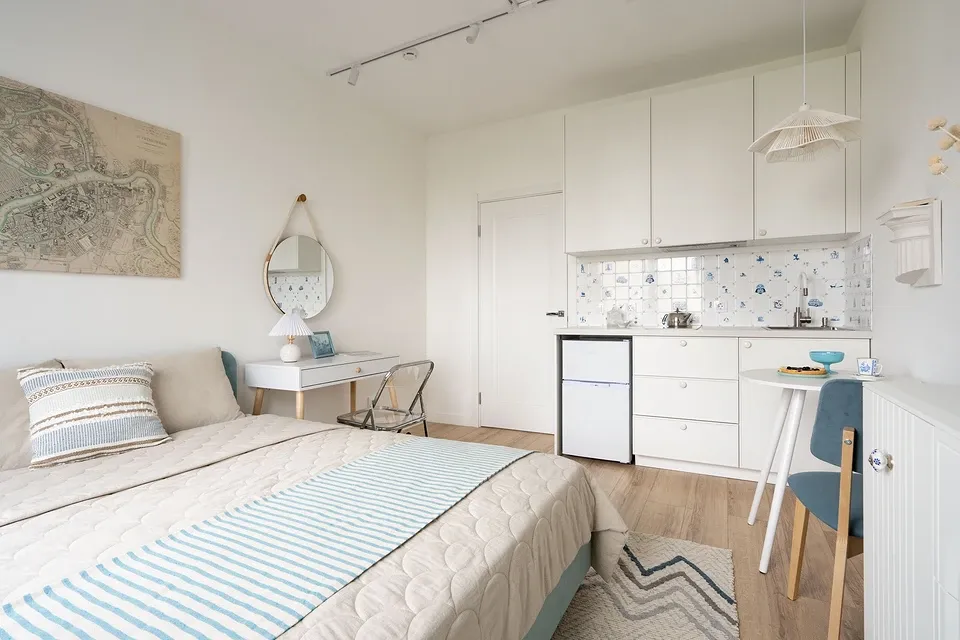
The main challenge was combining multiple functional zones in a tiny space: a kitchen with dining, a sleeping area, and a workspace.
The kitchen was kept visually light with white cabinet fronts. A mini-fridge sits in the lower unit without a door to avoid overheating. The countertop holds a two-burner cooktop, and a microwave is hidden inside an upper cabinet.
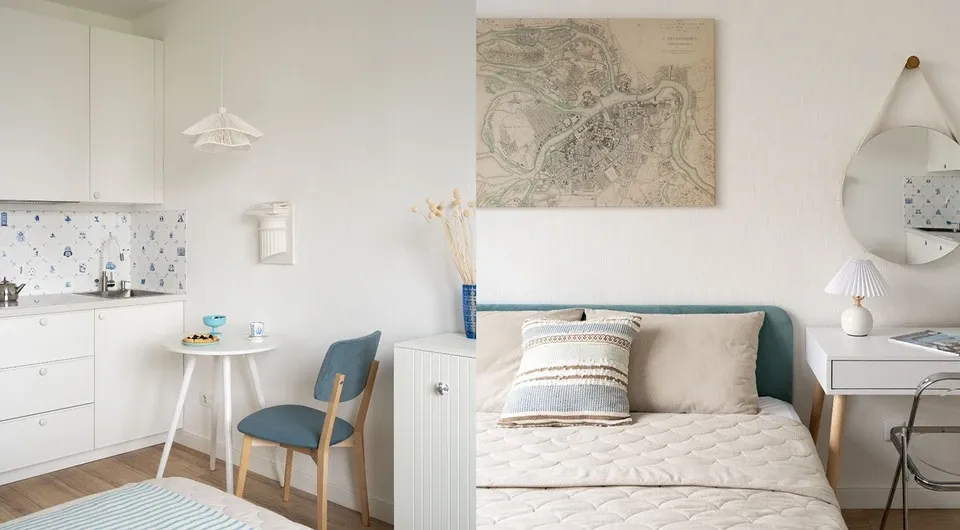
The dining table, 60 cm in diameter, works for one or two people. I added a soft chair plus a foldable transparent chair that can also serve the workspace.
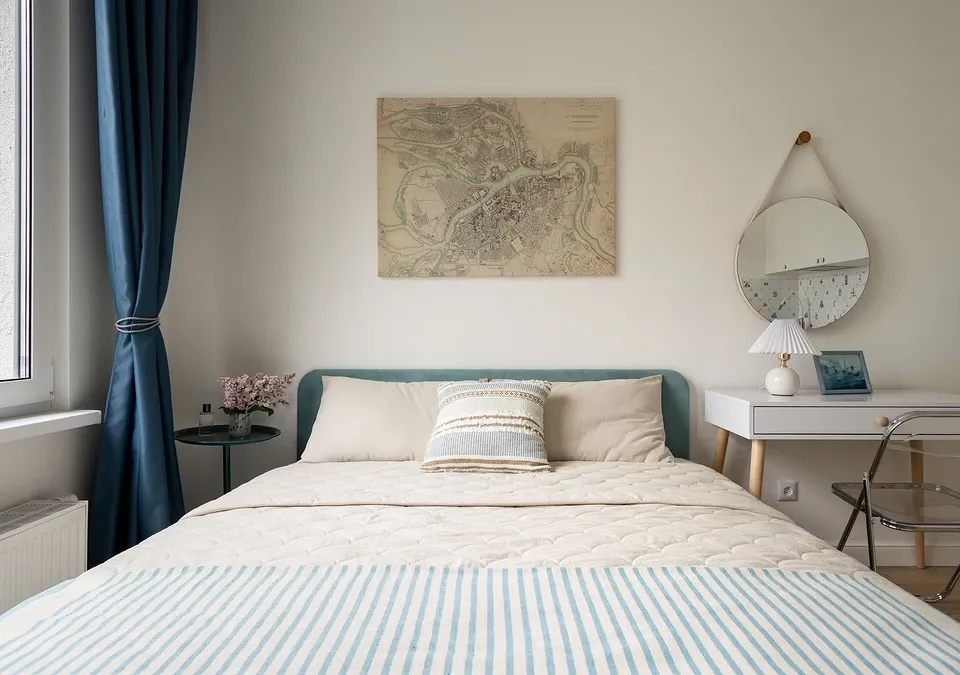
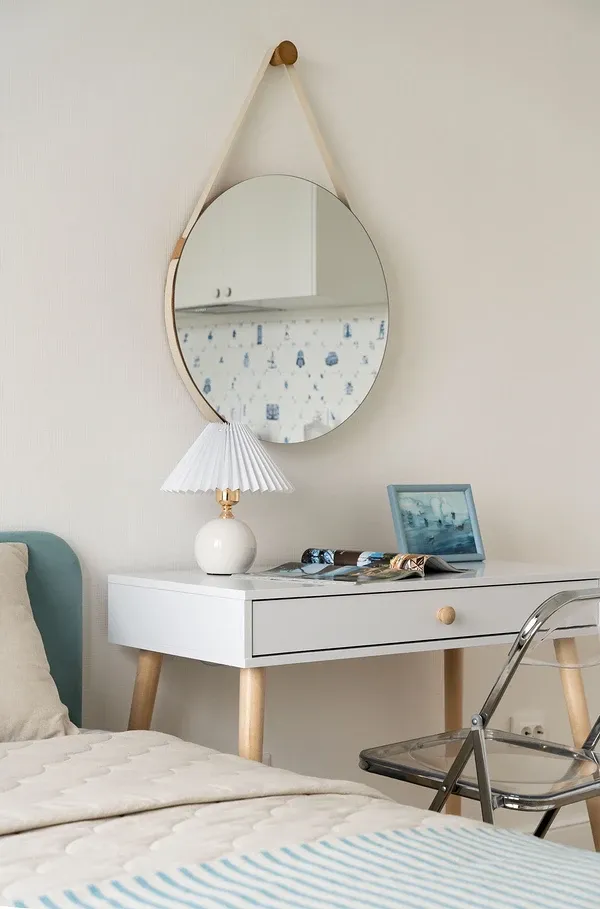
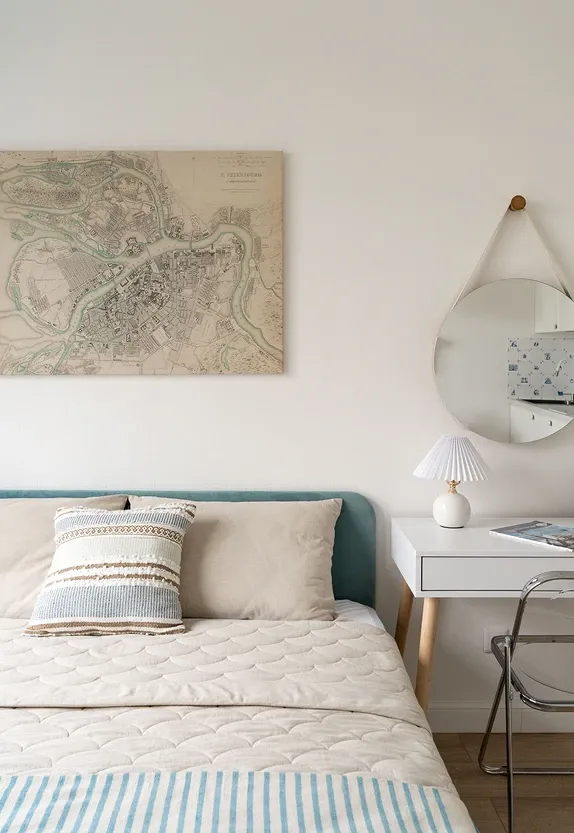
The bed is a full-size double with a lift-up storage mechanism. I chose a model with a thin, soft headboard to avoid overwhelming the space.
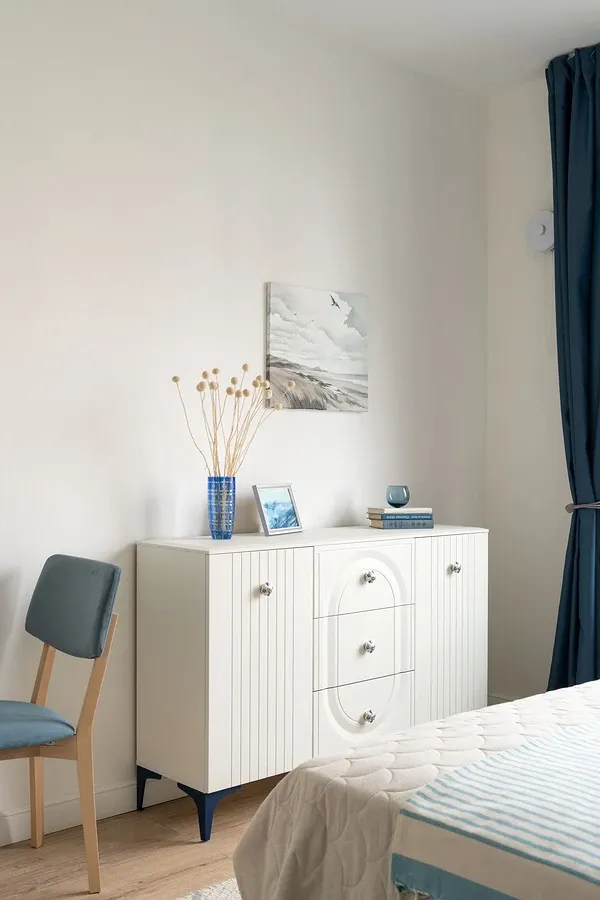
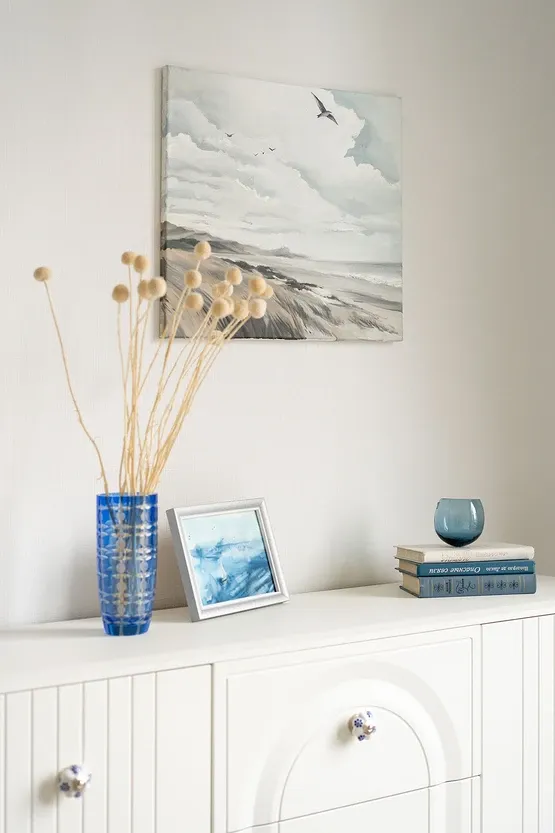
Across from the bed is a repurposed dresser. Its black legs were painted blue, and plain handles were replaced with ceramic ones featuring blue details to match the interior accents.
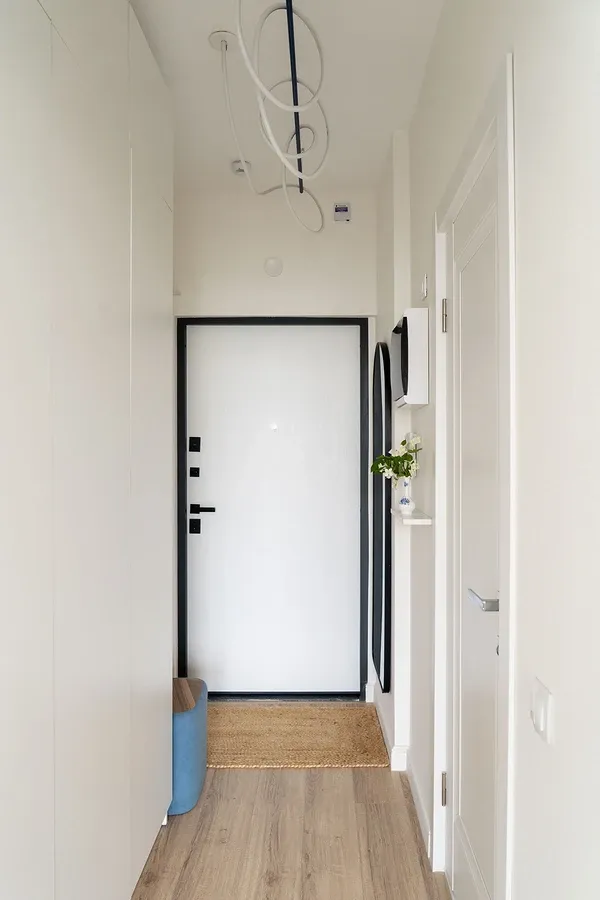
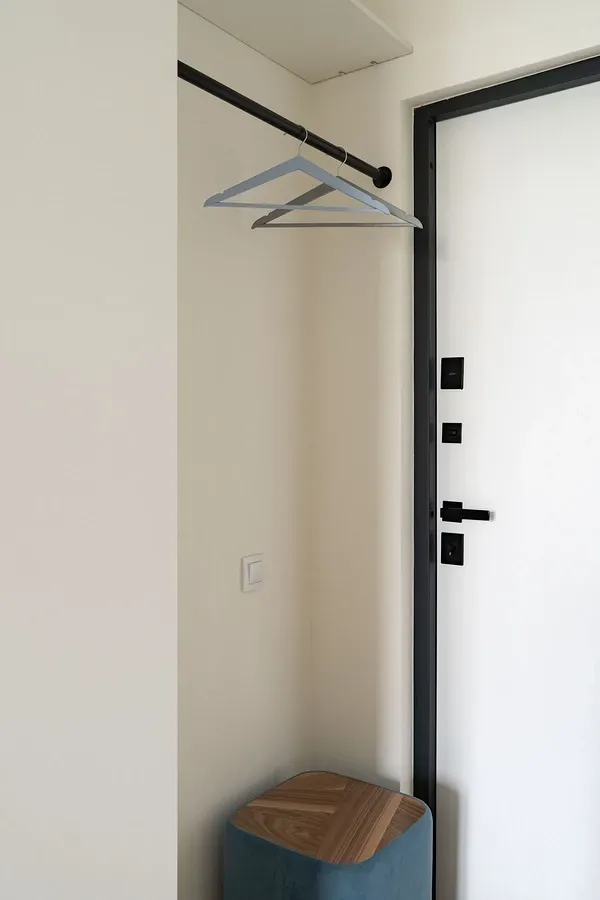
The main wardrobe is in the hallway, with space for clothes, shoes, and household items. By the entrance, I added a rail with hangers for outerwear, a pouf, and a small marble shelf for keys and small items.
In the bathroom, I installed a mirrored cabinet above the sink and a washer-dryer combo under a specially selected sink designed for above-appliance installation.

Lighting
The developer had already made ceiling wiring points. Over the kitchen and sleeping area, I used track lighting with adjustable spotlights, powered from a single outlet. This allows easy changes to light direction and intensity. Over the dining table, I hung a decorative light fixture, also connected to the track via an adapter.
In the hallway, I installed a custom light made to my design, using a flexible neon strip that can be moved as needed. Its slim profile ensures it doesn’t interfere with the wardrobe doors.
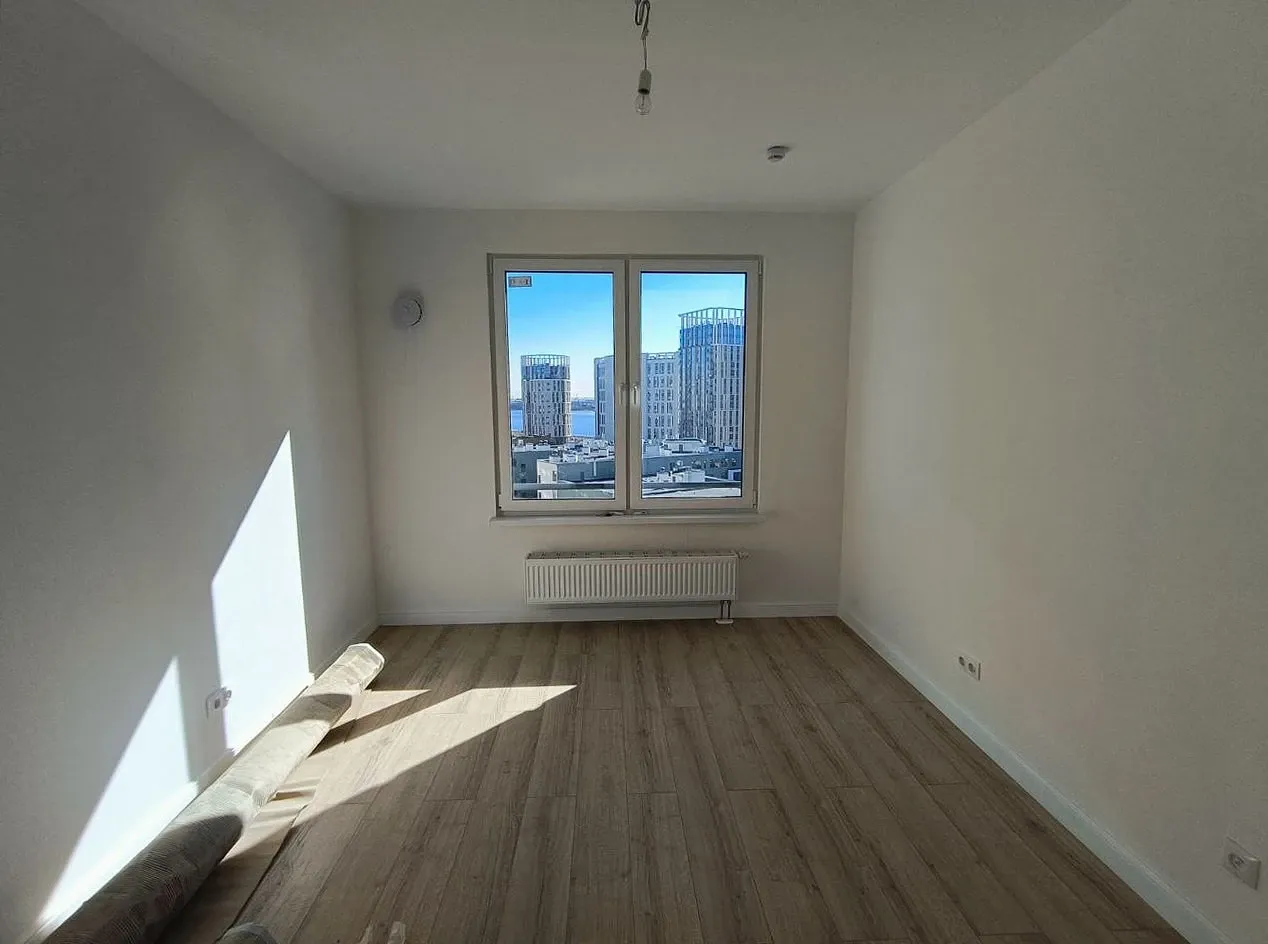
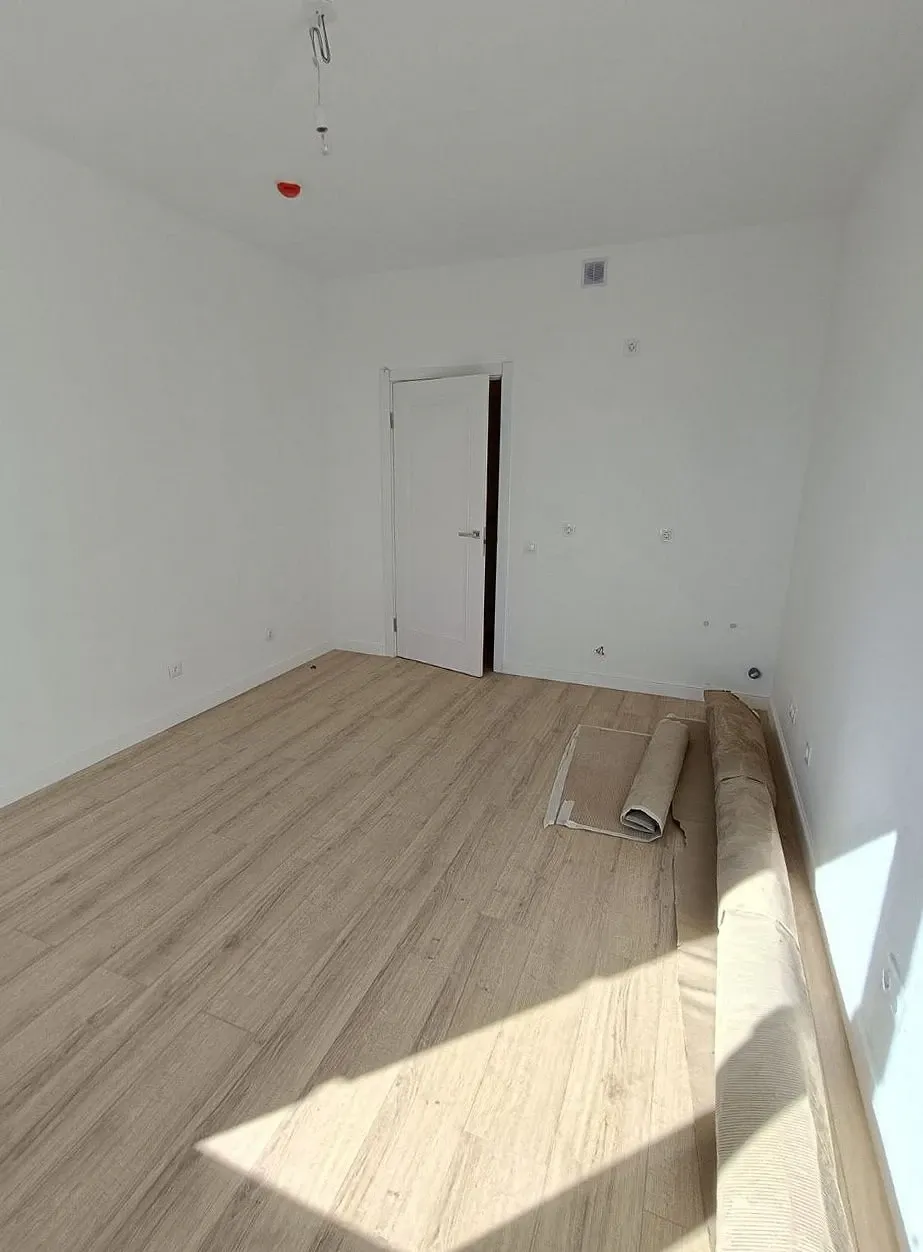
Room Before Renovation
Support Aesthete Living
Enjoyed this lesson? Get access to 15+ premium lessons, ad-free reading, early lesson access, and a supporter badge for €3.99/month.